A Nut Bolt Washer is a small but critical part of a bolted joint. It usually sits beneath the nut or bolt head, spreading clamping force across the contact surface. Without it, a hard nut can press into softer steel, paint, or aluminum. The result may be surface damage, uneven pressure, or gradual loosening. It looks simple. Its role is not.
Industry demand shows why these components matter. Grand View Research estimated the global fasteners market at approximately USD 90.7 billion in 2023, with continued growth expected through 2030. The U.S. Geological Survey also identifies steel as a fundamental material for construction, machinery, transportation, and industrial equipment. These sectors depend on reliable threaded connections. However, market size does not prove joint safety. Design quality does.
A properly selected Nut Bolt Washer supports load distribution and helps maintain joint stability. Its performance depends on diameter, thickness, material, surface finish, and installation torque. ISO 898-1 classifies mechanical properties for carbon-steel and alloy-steel fasteners, while ISO 10644 addresses washer assemblies used with bolts and screws. Engineers should match these requirements, not choose parts by appearance alone.
Small detail. Large consequence.
In practical use, imagine a washer beneath a flange bolt on a vibrating machine. It creates a broader bearing surface and reduces local deformation. Yet a washer cannot correct incorrect torque, damaged threads, corrosion, or poor alignment. That assumption is common, and it fails in real installations. This guide explains how the Nut Bolt Washer works, where it belongs, and how professional standards support safer selection. Its conclusions should still be checked against manufacturer data, project specifications, and qualified engineering judgment.
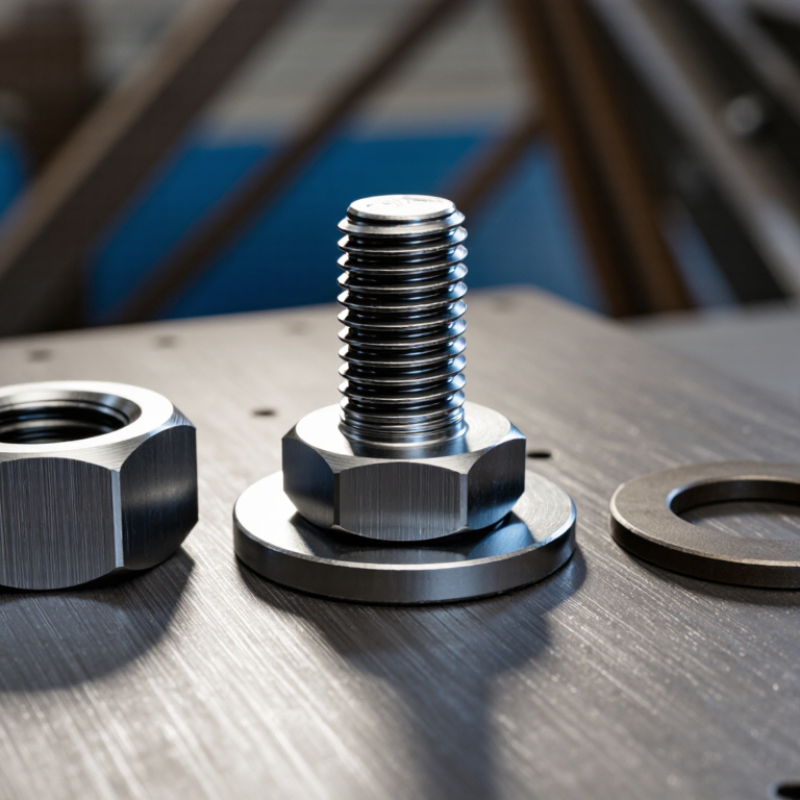
A nut, bolt, and washer form a simple fastening system. The bolt is a threaded metal shaft with a head on one end. Its threads pull materials together when the nut turns. The nut fits over the bolt and holds the joint under tension. A washer usually sits beneath the bolt head, the nut, or both.
A washer spreads pressure across a wider surface. Imagine tightening a bolt against a wooden board. Without a washer, the bolt head can press into the wood and leave a deep mark. A flat washer reduces that damage and helps the joint keep its clamping force. A lock washer, toothed washer, or similar design may resist loosening, although no washer can replace correct tightening.
The parts must match. Thread size, pitch, material, and washer diameter all matter. In workshop repairs, I check that the nut turns smoothly by hand before using a wrench. This simple step can reveal damaged or mismatched threads. I then tighten the fastener gradually, keeping the bolt straight. Over-tightening is a common mistake. It can stretch the bolt, crush soft materials, or damage the threads. Under-tightening is also risky, especially where vibration occurs. A washer may look insignificant, but its position and surface condition affect the entire connection. Rust, dirt, or burrs can reduce reliable contact. I still inspect the joint after assembly because real conditions are rarely perfect.
A nut, bolt, and washer form a simple clamping system. The bolt passes through aligned holes, while the nut grips its threaded end. Turning the nut pulls the bolt tighter and creates clamping force between the joined parts. This force keeps panels, brackets, or machine components from separating during normal use.
The washer sits beneath the nut, the bolt head, or both. Its broad surface spreads pressure across the material. It can also protect painted surfaces, reduce local damage, and provide a more stable tightening point. A flat washer suits general fastening, while a locking washer may help resist loosening from vibration. However, a locking washer is not a cure for every loose joint. Correct thread engagement and suitable tightening remain essential.
In practice, I check the hole size, washer diameter, and thread condition before tightening. The washer should sit flat, without dirt, burrs, or a bent edge. The nut should run smoothly by hand for several turns. Never force a damaged thread.
Torque matters.
Too little torque may allow movement. Too much can stretch the bolt, crush softer material, or strip the nut. I have found that hand-tightening often feels secure, yet the joint may still shift under load. A calibrated torque tool gives more reliable results, although the correct value depends on bolt size, material, lubrication, and design. Some assemblies need periodic inspection because vibration, settling, or temperature changes can reduce clamping force over time.
| Component | Main Function | How It Works in the Assembly | Typical Shape or Feature | Common Materials | Important Selection Factors |
|---|---|---|---|---|---|
| Bolt | Provides the threaded shaft that passes through the parts being joined. | The bolt head bears against one side of the joint while the threaded end receives the nut. | Threaded shank with a head, commonly hexagonal for wrench installation. | Carbon steel, stainless steel, alloy steel, and brass. | Diameter, thread pitch, length, strength grade, corrosion resistance, and head style. |
| Nut | Creates clamping force when tightened onto the bolt. | Internal threads engage with the bolt threads and convert tightening torque into axial tension. | Six-sided external body with an internally threaded hole. | Steel, stainless steel, brass, and nylon-based engineering plastics. | Matching thread diameter and pitch, strength, temperature, corrosion exposure, and locking requirements. |
| Flat Washer | Distributes the clamping load and protects the joint surface. | Its larger outer diameter spreads pressure over a wider area, reducing surface damage and pull-through. | Thin, flat ring with a central clearance hole. | Zinc-coated steel, stainless steel, hardened steel, brass, and plastic. | Inside diameter, outside diameter, thickness, hardness, surface finish, and load area. |
| Spring Lock Washer | Provides limited resistance to loosening caused by vibration or movement. | Its split and slightly raised form creates spring action and increases friction under the nut or bolt head. | Split ring with a small axial offset. | Spring steel, carbon steel, and stainless steel. | Joint vibration, available space, material hardness, corrosion conditions, and required locking performance. |
| Toothed Lock Washer | Increases resistance to rotation between the fastener and the bearing surface. | Teeth bite into the contact surfaces, creating mechanical interference and additional friction. | Internal or external teeth around a thin washer ring. | Hardened carbon steel and stainless steel. | Surface hardness, coating compatibility, vibration level, electrical requirements, and risk of surface marking. |
| Joint Parts | Transmit the clamping force and carry the service load. | The parts are compressed between the bolt head or washer and the nut or washer. | Plates, brackets, flanges, frames, or other components with aligned holes. | Steel, aluminum, stainless steel, wood, composites, and plastics. | Material strength, hole size, joint thickness, surface condition, and load direction. |
| Nominal Thread Size | Coarse Pitch | Typical Clearance Hole | Typical Flat Washer Inside Diameter | Typical Flat Washer Outside Diameter | Typical Flat Washer Thickness |
|---|---|---|---|---|---|
| M6 | 1.00 mm | Approximately 6.6 mm | Approximately 6.4 mm | Approximately 12 mm | Approximately 1.6 mm |
| M8 | 1.25 mm | Approximately 9.0 mm | Approximately 8.4 mm | Approximately 16 mm | Approximately 1.6 mm |
| M10 | 1.50 mm | Approximately 11.0 mm | Approximately 10.5 mm | Approximately 20 mm | Approximately 2.0 mm |
| M12 | 1.75 mm | Approximately 13.5 mm | Approximately 13.0 mm | Approximately 24 mm | Approximately 2.5 mm |
| Step | Action | Purpose | Result |
|---|---|---|---|
| 1 | Align the holes in the parts being joined. | Ensures that the bolt can pass through without damaging the threads. | The joint is ready for fastening. |
| 2 | Insert the bolt through the joint. | Positions the threaded shaft and bolt head. | The bolt passes through the connected parts. |
| 3 | Place a flat washer beneath the nut when surface protection or load distribution is needed. | Reduces bearing pressure and helps prevent surface damage. | The clamping force is distributed over a larger area. |
| 4 | Thread the correctly matched nut onto the bolt. | Engages the internal and external threads. | The joint begins to tighten. |
| 5 | Tighten the nut to the specified torque when a torque value is available. | Produces the required bolt tension without excessive tightening. | The connected parts are held together by controlled clamping force. |
What Is a Nut Bolt Washer and How Does It Work?
A nut, bolt, and washer create a controlled clamping joint. The bolt supplies tension, while the nut holds that tension. A washer spreads pressure beneath the bolt head or nut. This reduces surface damage and helps prevent pull-through in softer materials. In field inspections, a missing washer often leaves a circular indentation around the hole. That small mark can signal uneven load transfer.
Material choice affects strength, corrosion resistance, and service temperature. Carbon steel suits general structural fastening. Stainless steel performs better in damp environments, but it may gall during tightening. Hardened steel washers are useful under high bolt loads. Plain, spring, serrated, and fender washers serve different purposes. A fender washer has a wider outside diameter, helping support thin sheet metal. Spring washers are still used in some assemblies, although their locking performance deserves careful review.
Size standards make replacement safer. ISO 7089 specifies plain washer dimensions; for example, an M8 washer commonly has an 8.4 mm hole, a 16 mm outside diameter, and 1.6 mm thickness. ISO 4032 covers common hexagon nuts, while ISO 898-1 defines mechanical properties for carbon and alloy steel fasteners. ASME B18.21.1 also provides washer dimensions used in inch-based systems. Measure the bolt diameter, thread pitch, washer opening, and thickness. Do not rely on appearance alone. A washer that fits loosely may still concentrate force, especially when the joint surface is uneven.
A nut, bolt, and washer work as a clamping system. The bolt passes through joined materials, while the nut creates tension. The washer spreads pressure beneath the nut or bolt head. This helps protect soft surfaces and reduces loosening caused by vibration. However, compatible components require more than matching visible diameters.
Measure the bolt’s nominal diameter and thread pitch with a thread gauge. The nut must match both measurements exactly. Check the bolt’s strength grade before selecting a nut with equivalent capability. A washer’s inside diameter should fit closely without binding. Its outside diameter and thickness should suit the hole size and surface pressure. For outdoor or damp applications, select materials with suitable corrosion resistance. Mixed metals can create problems over time.
Torque matters. Too little clamping force may allow movement, while excessive torque can stretch the bolt. Follow a verified torque specification for the assembly and lubrication condition. I often test-fit the parts by hand before using tools. It catches many errors early. A common mistake is choosing a thick washer without checking the remaining thread engagement. I have made that assumption before, and the joint felt secure but performed poorly. Recheck alignment, thread engagement, and washer seating under realistic load. Small details decide whether the connection remains dependable.
A nut, bolt, and washer assembly works by creating clamp force between two surfaces. The washer spreads pressure and protects the joint surface. Keep it flat against the material, unless the design specifies another orientation. Start the nut by hand. The bolt should turn smoothly for several threads. Stop if it binds.
Clean, dry threads improve consistency, but do not remove every trace of specified lubricant. The NASA Fastener Design Manual, NASA-RP-1228, explains that friction can consume about 90% of tightening torque. Approximately 50% is lost beneath the nut or bolt head, while about 40% is lost in the threads. Only about 10% stretches the bolt. Torque is not perfect.
Use a calibrated torque wrench and the value required by the engineering specification. Tighten gradually in two or three passes. For a multi-bolt flange, follow the stated cross-pattern sequence. For a simple joint, tighten evenly without sudden force. Hold the bolt head when necessary. This prevents unwanted rotation.
A common mistake is tightening until the washer visibly crushes. That can damage softer materials and reduce joint reliability. ASME PCC-1-2022 stresses controlled assembly practices, including surface condition, lubrication, and tightening sequence. In field work, I have found that a clean setup matters more than speed. Still, torque alone cannot confirm preload. Friction varies. Check the joint design, washer type, and service conditions before final tightening.
A washer is placed beneath a bolt head or nut to distribute the clamping force over a larger area, reduce surface damage, and help prevent the fastener from sinking into the material. The chart compares common ISO 7089 flat-washer sizes used with metric bolts.
How to install and tighten: Align the parts, place the washer under the bolt head or nut, hand-tighten the nut, and then tighten gradually with a wrench or torque wrench. The correct tightening torque depends on bolt size, strength grade, lubrication, thread condition, and joint design.
The bolt passes through aligned holes. The nut grips its threaded end. Tightening creates clamping force between the joined parts.
A washer spreads pressure across a wider surface. It can protect paint, reduce indentation, and stabilize tightening.
Place it beneath the nut, the bolt head, or both. It should sit flat without dirt, burrs, or bent edges.
A wide washer supports more surface area. It can reduce pull-through and circular marks around the hole.
Match the bolt diameter, thread pitch, and strength capability. The nut must match the bolt threads exactly.
Measure the bolt diameter, thread pitch, washer opening, outside diameter, and thickness. Do not trust appearance alone.
Too little torque may allow movement. Too much can stretch the bolt, crush soft material, or strip the nut. Torque matters.
Check alignment, thread engagement, and washer seating. Apply realistic load when possible. A joint that feels tight may still shift.
No. It may help resist vibration, but it cannot replace proper thread engagement and suitable tightening.
Do not force damaged threads or add a thick washer blindly. I once assumed a secure feeling meant good performance, but it did not.
A Nut Bolt Washer assembly is a simple but essential fastening system used to join and secure materials. The bolt passes through aligned holes, while the nut threads onto the bolt to create clamping force. The washer sits beneath the nut or bolt head, helping distribute pressure, protect the surface, reduce loosening, and provide a more stable connection. Each component has a distinct role, but they work together to maintain strength and alignment under vibration or repeated loads.
Choosing compatible components requires attention to material, thread type, diameter, length, shape, and recognized size standards. The nut and bolt must have matching threads, while the washer should fit the bolt diameter and suit the contact surface. During installation, clean and align the parts, place the washer correctly, and tighten the nut gradually using suitable tools. Applying consistent torque helps prevent both under-tightening and damage caused by excessive force. Regular inspection can also identify loosening, corrosion, or wear before the connection becomes unreliable.

Dongshuo Fastener